Django makes managing forms relatively straightforward, but their default styling can be unappealing. This post demonstrates how to effortlessly enhance the appearance of Django forms using Bootstrap 5 within templates. By leveraging Django's built-in template capabilities, we can easily incorporate features like error handling while transforming the form's visual appeal with Bootstrap 5's stylish components.
1. Add Required Links for Bootstrap
To integrate Bootstrap's styling into your Django forms, you'll first need to include the necessary CSS and JavaScript links within your HTML template structure. A common approach is to incorporate these links in your base template, ensuring they're loaded on all pages where you plan to use Bootstrap-styled forms.
First add required links for bootstrap somewhere, for example in base.html
<!DOCTYPE html>
<html lang="en">
  <head>
    <meta charset="UTF-8" />
    <meta name="viewport" content="width=device-width, initial-scale=1.0" />
    <title>
      {% block title %}
        My Site
      {% endblock %}
    </title>
    <link href="https://cdn.jsdelivr.net/npm/bootstrap@5.3.3/dist/css/bootstrap.min.css" rel="stylesheet" integrity="sha384-QWTKZyjpPEjISv5WaRU9OFeRpok6YctnYmDr5pNlyT2bRjXh0JMhjY6hW+ALEwIH" crossorigin="anonymous" />
  </head>
  <body>
    <header>
      <h1>Welcome to My Site</h1>
      <nav class="navbar navbar-expand-lg navbar-light bg-light">
        <a class="navbar-brand" href="#">My Site</a> <button class="navbar-toggler" type="button" data-bs-toggle="collapse" data-bs-target="#navbarNavAltMarkup" aria-controls="navbarNavAltMarkup" aria-expanded="false" aria-label="Toggle navigation"><span class="navbar-toggler-icon"></span></button>
        <div class="collapse navbar-collapse" id="navbarNavAltMarkup">
          <ul class="navbar-nav">
            <li class="nav-item">
              <a class="nav-link active" aria-current="page" href="{% url 'home' %}">Home</a>
            </li>
            <li class="nav-item">
              <a class="nav-link" href="#">About</a>
            </li>
            <li class="nav-item">
              <a class="nav-link" href="{% url 'contact' %}">Contact</a>
            </li>
          </ul>
        </div>
      </nav>
    </header>

    <main>
      {% block content %}
        <!-- Content from child templates will be inserted here -->
      {% endblock %}
    </main>

    <footer>
      <p>© 2024 My Site. All rights reserved.</p>
    </footer>
    <script src="https://cdn.jsdelivr.net/npm/bootstrap@5.3.3/dist/js/bootstrap.bundle.min.js" integrity="sha384-YvpcrYf0tY3lHB60NNkmXc5s9fDVZLESaAA55NDzOxhy9GkcIdslK1eN7N6jIeHz" crossorigin="anonymous"></script>
  </body>
</html>
2. Create A Model
To store the data collected by our form, we'll define a Django model. This model outlines the structure of the data we want to save, specifying field types, their maximum lengths, and any other relevant constraints. By creating a model, we establish a blueprint for database interactions and ensure data integrity.
from django.db import models

# Create your models here.


class Contact(models.Model):
    name = models.CharField(max_length=100)
    email = models.EmailField()
    message = models.TextField(max_length=250)

    def __str__(self):
        return f"Message by {{self.name}}"
3. Create a View
To handle form submissions and display the form, we'll create a view function. This Python function will process incoming requests, instantiate our ModelForm, and render the form template. For successful form submissions, the view will save the data and redirect to a confirmation page or another appropriate URL.
from django.shortcuts import render
from django.urls import reverse
from django.views.generic import TemplateView, CreateView

from .models import Contact
from .forms import ContactForm

# Create your views here.


class HomeView(TemplateView):
    template_name = "home.html"


class ContactView(CreateView):
    model = Contact
    form_class = ContactForm
    template_name = "contact.html"

    def get_success_url(self) -> str:
        return reverse("home")
4. Create Form Class
Next, we'll create a ModelForm to define the structure of our form. This Django feature simplifies the process by automatically generating form fields based on a corresponding model. By specifying the desired fields and their attributes, we lay the foundation for capturing and validating user input efficiently.
from django import forms
from .models import Contact


class ContactForm(forms.ModelForm):
    class Meta:
        model = Contact
        fields = (
            "name",
            "email",
            "message",
        )
        widgets = {
            "name": forms.TextInput(attrs={"class": "form-control"}),
            "email": forms.EmailInput(attrs={"class": "form-control"}),
            "message": forms.Textarea(attrs={"class": "form-control"}),
        }
5. Write The Template File
The final step is to create a template to render the form. This HTML file will utilize Bootstrap classes to style the form elements according to your desired layout. You'll employ Django template syntax to access the form fields and display them within the Bootstrap structure. Customizing the template allows you to create a visually appealing and user-friendly form that aligns with your project's design.
{% extends 'base.html' %}

{% block title %}
  Contact Us
{% endblock %}

{% block content %}
  <div class="container">
    <form method="post">
      {% csrf_token %}
      {% for field in form %}
        <div class="mb-3">
          {{ field.label_tag }}
          {{ field }}
          {% if field.errors %}
            <div class="text-danger">{{ field.errors }}</div>
          {% endif %}
        </div>
      {% endfor %}
      <button class="btn btn-primary m-3" type="submit">Send Message</button>
    </form>
  </div>
{% endblock %}
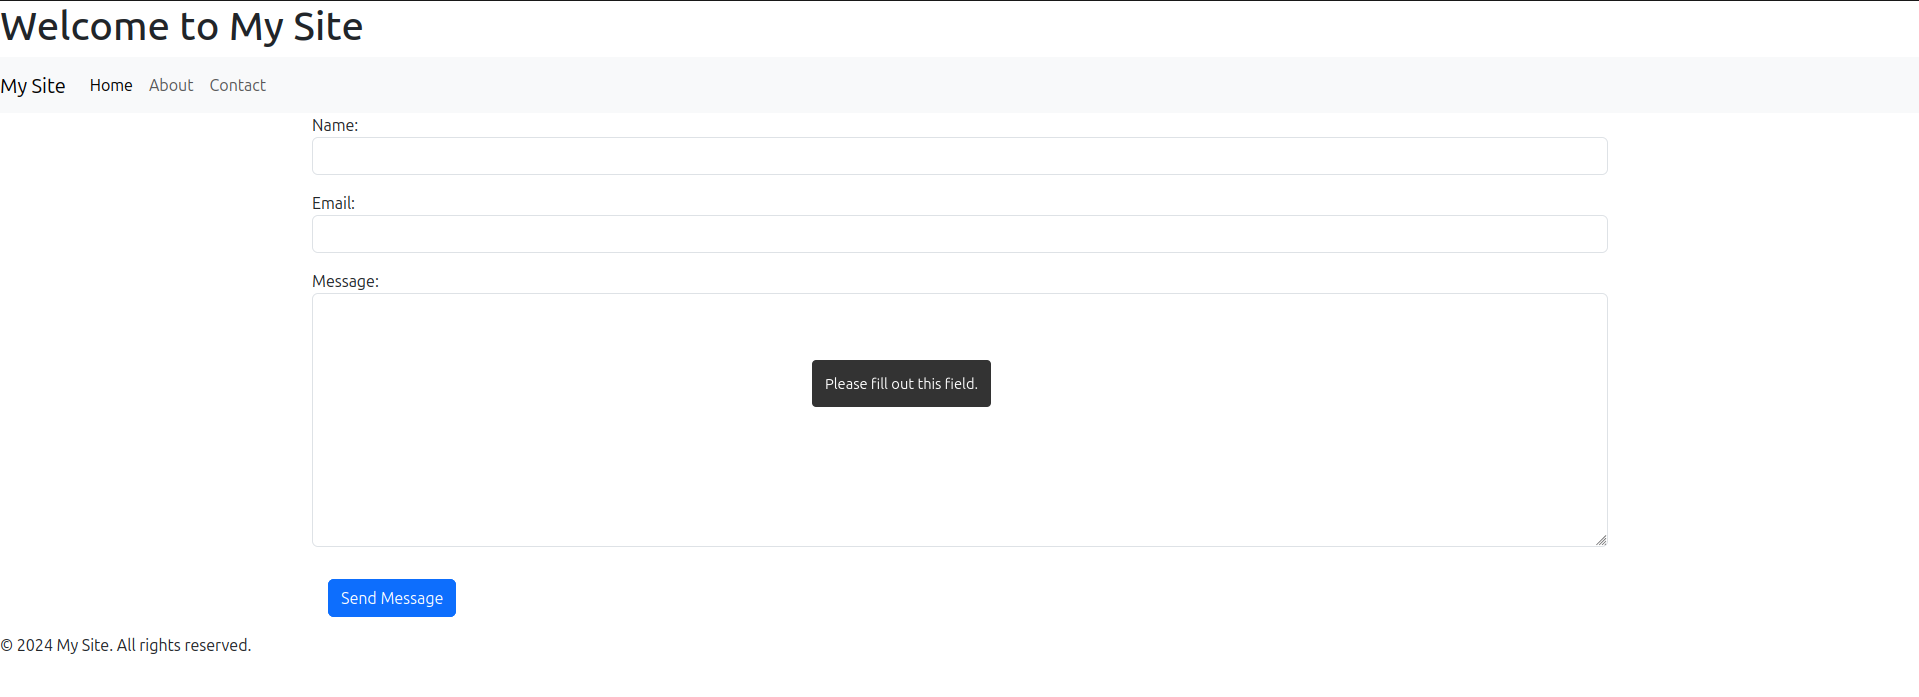
6. The Result
The final result is a visually appealing and user-friendly form. By combining Django's form handling capabilities with Bootstrap 5's styling framework, we've transformed the default, unattractive form into a polished and interactive element. The screenshot clearly showcases the enhanced appearance and improved user experience achieved through this integration.